









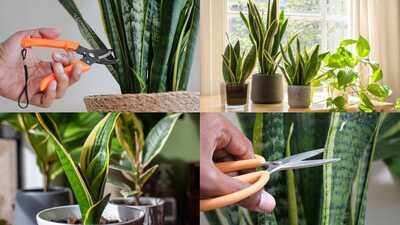
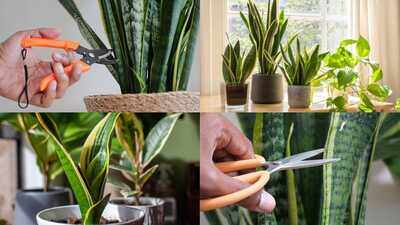
Snake plants have earned a reputation as nearly impossible to kill, thriving on neglect and forgiving almost every mistake a beginner gardener can make. So when a leaf gets damaged, snaps off while repotting, or simply grows too long and needs trimming, the instinct for most people is to toss it straight into the bin. But experienced gardeners know better: a single healthy snake plant leaf, cut into pieces and buried in soil, can quietly grow into an entirely new plant over the following weeks. It’s one of the simplest and most satisfying ways to multiply your greenery without spending a rupee, and it works far more often than most people expect.
Why snake plant leaves are too valuable to toss
Unlike most houseplants, where a broken or trimmed leaf is simply garden waste, a snake plant leaf carries the same regenerative ability as the rest of the plant. Snake plants belong to a group of succulents capable of producing entirely new roots and shoots from leaf tissue alone, a trait most common garden plants simply don’t have. That means every leaf you trim, every piece that snaps off while moving a pot, or every healthy leaf you’re willing to sacrifice is really a potential new plant waiting to happen. Throwing it away is, in a very literal sense, throwing away a free plant.
How leaf propagation actually works
The idea behind this method is straightforward, even if the biology sounds a little unusual. When a section of snake plant leaf is placed in soil, the cut end gradually develops small roots, drawing on the moisture and nutrients stored inside the thick leaf tissue. Over the following weeks, a tiny rhizome, the underground stem structure snake plants grow from, begins to form at the base of that rooted section. Eventually, a small new shoot emerges from this rhizome and pushes up through the soil, marking the start of an entirely new plant growing independently of the original leaf.
Cutting the leaf the right way
Getting the cut right matters more than people expect. Using a clean, sharp knife or blade, slice a healthy leaf into sections roughly two to three inches long, and keep track of which end was originally closer to the soil, since planting a segment upside down can prevent it from rooting at all or delay things considerably. Many gardeners mark the bottom edge with a small notch or angled cut as a quick visual reminder. Before planting, it also helps to let the cut ends sit out for a day so they callous over slightly, which reduces the chances of the segment rotting once it’s in soil.
Choosing the right pot and soil
Snake plants are naturally suited to gritty, fast-draining conditions, and their leaf cuttings are no different. A loose potting mix designed for succulents or cacti, or a regular potting mix blended generously with sand or perlite, works well and prevents the cut segments from sitting in damp soil for too long. A small pot or a shared shallow container works fine for several cuttings at once, as long as there’s a drainage hole at the bottom. Overly rich or moisture-retentive soil is one of the more common reasons cuttings fail, since it invites rot before roots even have a chance to form.
Burying the leaf segments correctly
Once the cuttings are ready, insert each segment about an inch into the soil, right side up, spacing them out slightly so they aren’t crowded together. A light watering right after planting helps settle the soil around the cutting, but from there, restraint is more useful than enthusiasm; watering only when the top layer of soil feels completely dry is usually enough. Placing the pot somewhere with bright, indirect light rather than harsh direct sun gives the cutting the best chance to root without additional stress while it’s still establishing itself.
Patience is the real requirement
This is a project that rewards patience more than effort. Roots typically take several weeks to develop, and the new shoot that eventually signals a successful cutting can take anywhere from one to a few months to appear, depending on the season and growing conditions. It’s tempting to tug at the cutting to check on progress, but disturbing it too often only slows things down. Warmer months tend to speed up the process considerably compared to cooler weather, so a cutting started in summer will generally show results faster than one started in winter.
A word of caution for variegated varieties
There’s one detail that trips up a lot of gardeners attempting this for the first time. Popular variegated snake plant varieties, with their attractive yellow-edged leaves, usually don’t pass that colouring on when grown from a leaf cutting; the new plant that emerges is far more likely to grow with plain green leaves instead. This happens because the yellow variegation exists only in a thin outer layer of the leaf’s cells, a trait that doesn’t transfer through leaf propagation. Gardeners who specifically want to keep a variegated variety true to form usually need to propagate by dividing the rhizome instead.
Small cutting, big reward
It costs nothing but a little patience, and the payoff is a genuinely new plant grown from something that would otherwise have ended up in the compost or the bin. Whether it’s to fill more pots around the house, share cuttings with friends and neighbours, or simply see the process through out of curiosity, propagating snake plant leaves is about as low-risk as gardening experiments get. The next time a leaf breaks or needs trimming, it might be worth reaching for a pot instead of the dustbin.
Disclaimer:
This article is intended for general informational purposes only. Results from propagating snake plant leaves can vary depending on the plant’s health, the season, and growing conditions, and not every cutting will root successfully. For specific concerns or advice tailored to your plants, consult a local nursery or horticulture expert.